Labels

Showing posts with label Recycled crafts. Show all posts

Wednesday, 7 September 2016

Crepe paper flower Garland tutorial


Hello everyone!
I know I am not a regular blogger, but hey, you have been seeing all my Facebook posts right?! If you don't know what I am talking about, check out my Facebook page here
So, we all have been busy lately, because FESTIVAL SEASON IS HERE!! That means, lot of preparations, preparing sweets treats, new clothes, lots of cleaning up the house and decorating it. Well, lets start from the decoration part of it, because its my most favorite!
We all want all our decorations to last for a long time, don't we? I mean, real flowers are nice too, but lets be honest, its all a a bit expensive affair, don't you agree? Especially, if you are living in a place where the kind of flowers you are looking for are scarcely available. So, one of the next best thing? Ta-da... our very own lovely crepe paper garland. This is something we have been doing in our home since ages- be it Diwali (festival of lights) decorations, Dussera (Kinda hard to explain this festival) , Krishnashtami (Lord Krishna's birthday) or Ganesha chaturthi (Lord Ganesha's birthday). The entire house i.e., the main entrance, walls, railings, every room entrance and in places wherever we think would look fine, would be decorated with these lovely colorful flower garlands! oh what fun! We have amazing childhood memories attached with it. Since i came so far far away from my parents' home, I decided to do the decorations to the place we call it 'our' home. Also, i thought to put up a teeny tiny tutorial of the flowers, so that everyone can make it! without any further talking, let me start off with the tutorial.

Step 1: Look at the picture below and admire the beauty of it. Imagine doing this to your own home, with your own hands, of your own favorite colors.. Isn't it beautiful? Now let's hit the craft stores!


Step 2: Look for the textured crepe paper that is available in craft stores. It much easier to work with. if not plain paper works fine too. And the tools you need is a pair of scissors, and needle and twine/thread to make the garland.
Step 3: Cut a small portion of the crepe paper so that it makes a bigger rectangle. It doesn't matter if you make it a square too! The fun part of this project it nothing has to be exact because ultimately, it will turn out to be pretty! I cut a rectangle.


Step 4: Fold that piece into half, fold again to another half, and repeat it couple of times until it becomes a tiny (and fat) rectangle piece. If its too much to handle, go ahead, and unwrap couple of times and cut it at the seam. We can work with that piece later.


Step 5: Now find the center seams and start cutting it.The goal is to ultimately get smaller pieces of squares or rectangle. See the picture Below.

Step 6: We will now work with the stack of separate rectangular/square pieces we made earlier. Fold it one more time, and from one end to the other end, start cutting it only at the ends as shown in the picture below. Do not cut all the way through. Once you open the fold it should look like the 3rd picture shown below.


Step 7: Now comes the super fun part. Unravel all the cut stack of paper into seperate pieces.


Step 8: Pick each piece, pinch it at the plain uncut center, and twist it. Ta-da.. You just made flower. Just like that. Repeat this step some 100 times until you run out of paper. In no time you would start doing with both hands, one flower in each hand and you would be a flower making ninja!


Step 9: Take your needle and thread, string it at the centre. Just like how you string flowers to make a garland.  The method i used to string the garland is kind of complicated, I do not use a needle, but tie it around. I found this video tutorial on Youtube if you want to learn the way i did it. It is skillful but not mission impossible :p
Follow this link:
https://www.youtube.com/watch?v=vZ9wopJ1new


Step 10: Decorate and be proud! :)

P.S.: You can do this with plastic grocery bags, thin polythene table covers, colorful trash bags etc etc to make it washable. 

Love,
Kavya.

Monday, 1 June 2015

Frugal way to decorate a corner of your home : tutorial

Hi..
My latest weekend project, recycled floral arrangement. Wait, is that what its called? Well, i couldnt think of anything else.. so.. Lets have some fun, shall we?


I personally like this project because, its recycling, its cost effective ( i could actually say frugal), its fast, its fun and it looks absolutely elegant once finished.
We have these lovely hydrangeas growing in front of our home.. Just beautiful bunches of pink-purple-blue-green-white flowers.. Yeah.. It does turn so many colors from summer to winter. But every beautiful thing sometimes have to come to an end, and thats the early spring time.. No flowers, no leaves, dried stems, some even dead ones.. So.. Thats where our project comes in place.. Carefully trim the dried and dead stems, bring it home and make it look pretty, yet again. 
Since we are into June,tiny little leaves started to sprout, this is how it looks like-


Fortunately i had saved some dried stems, so just picked some and got started.
Spread it, and start peeling of its dry skin to have a smoother finish because we dont want those skin to peel off AFTER we finish painting.

Now for the paint part of it, you can choose any color that u like, paint it with pretty pastel colors and make different flowers on it, i just chose black. Any acrylic paint would do, might need 2 or 3 coats depending on the color you choose. Keep it aside for the paint to dry.
In the mean while, lets make some flowers!
You can go with any choice of paper and the color, i went with, guess what-- Kitchen tissues! I love them.. They have this lovely texture on them, doesnt cost you much, and easily available (at home i mean)
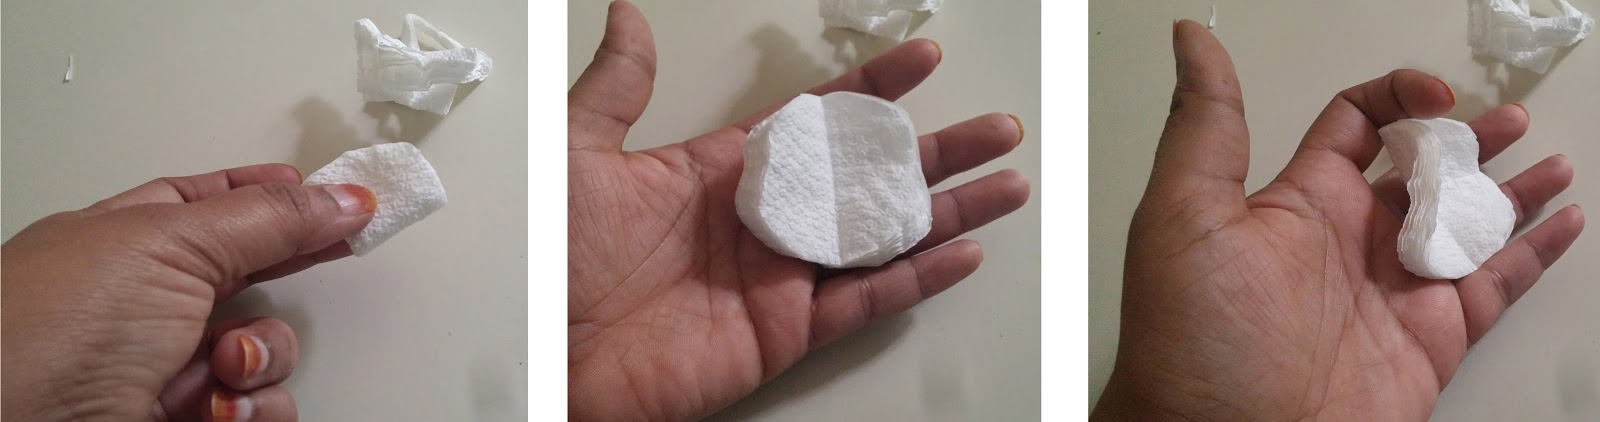
So lay it around, cut it into half, keep one half aside and work with the other half.. Fold, fold, fold and fold AND fold. Yep. Five times, everytime into half.


Factoid: Did u know that any kind of paper, when folded into halves, i can be done only 7 times max? Fun,  right? :)
Ok, so now we just need to pick the corner and cut an arc.. Like a quarter of a circle. And tada.. We have so many circles or circle looking like pieces in our hand. It need not have to make it perfect circles because we are going to crimp it anyway. Do not seperate it yet. And save the rest of the bits and odd pieces for something that i will explain in a bit.

Take a paint brush, preferably an old ones with bristles all over the place, dip it slightly only the tip of it in paint, and dab the ends of the circles we just cut.. It need not have to catch the paint all over, do not hesitate to seperate the stack just a little bit and paint.. Lets get some texture out of the brush.. Dots here and there.. Yes. Lovely! 


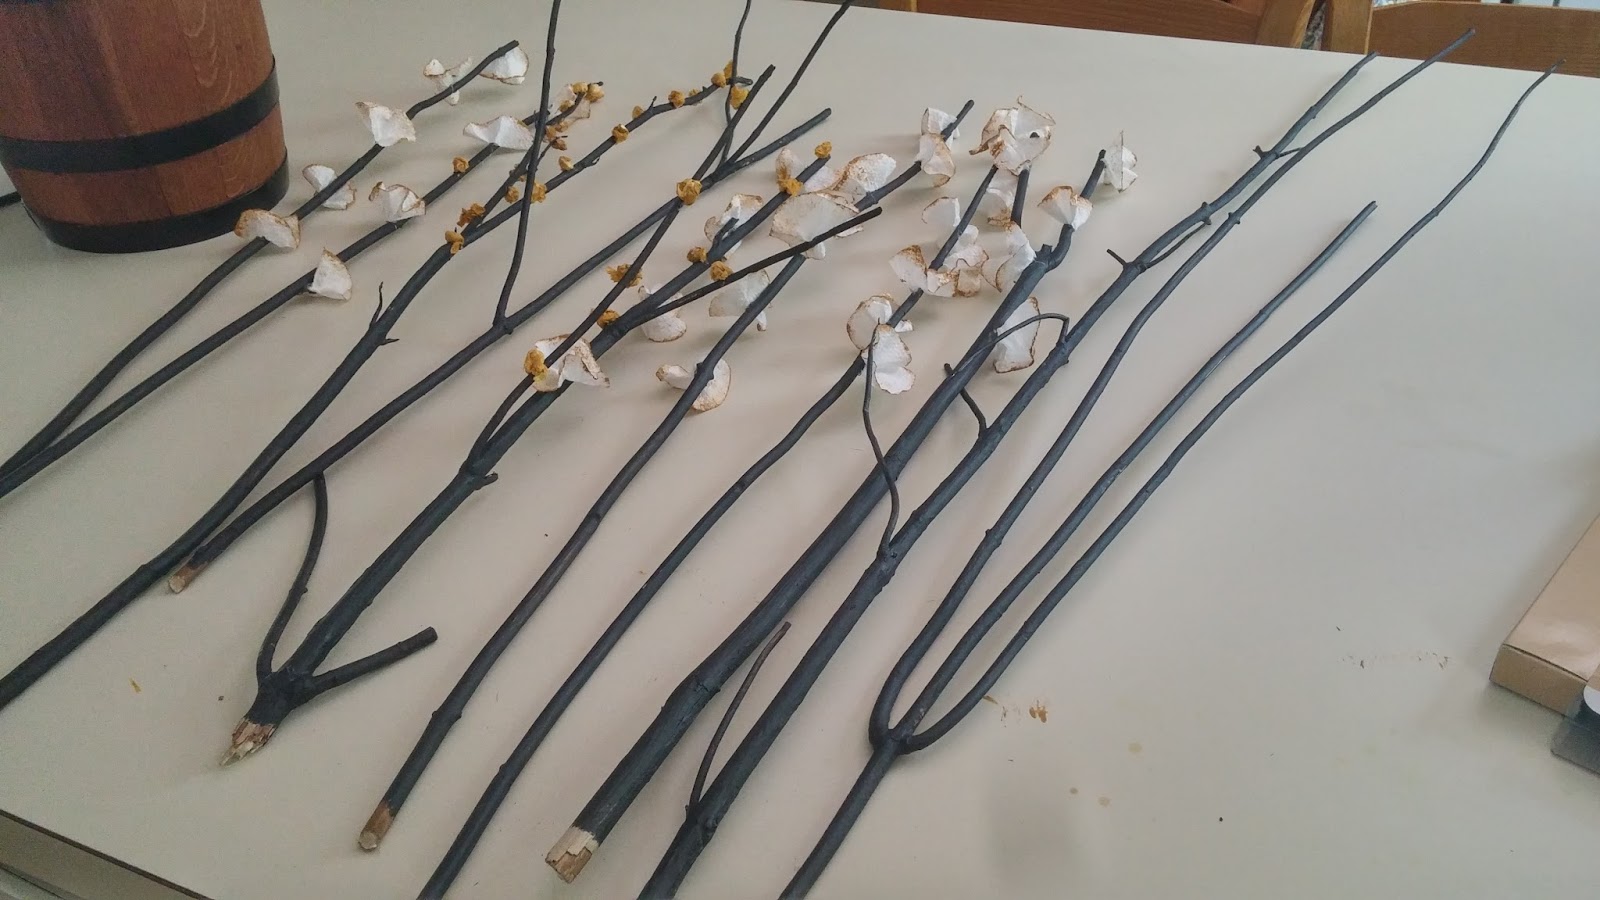
Leave it for drying for a bit, and lets go check on the stems. Nice and dry and black. 


Now back to the flowers, seperate the dried circles, and just give it a pinch at the centre. See? We just made a beautiful flower!

And thats it, hot glue-stem-flower and tada.. You have your own one of a kind, hand made, floral accent to your home.


Remember i asked you to save the bits and odd pieces previously? Lets make some buds out of it. Nope. Im not going to waste even a bit of the tissue paper.
So all you have to do is, take a bit, roll it into your hand like a dough, and paint the same color on it all over. Mine looks like a yellow popcorn.. Lol.. But doesnt matter, it looks natural and pretty anyway.. 


Glue those bits also onto the stem, and stack them together and aaah...(violins playing the background)
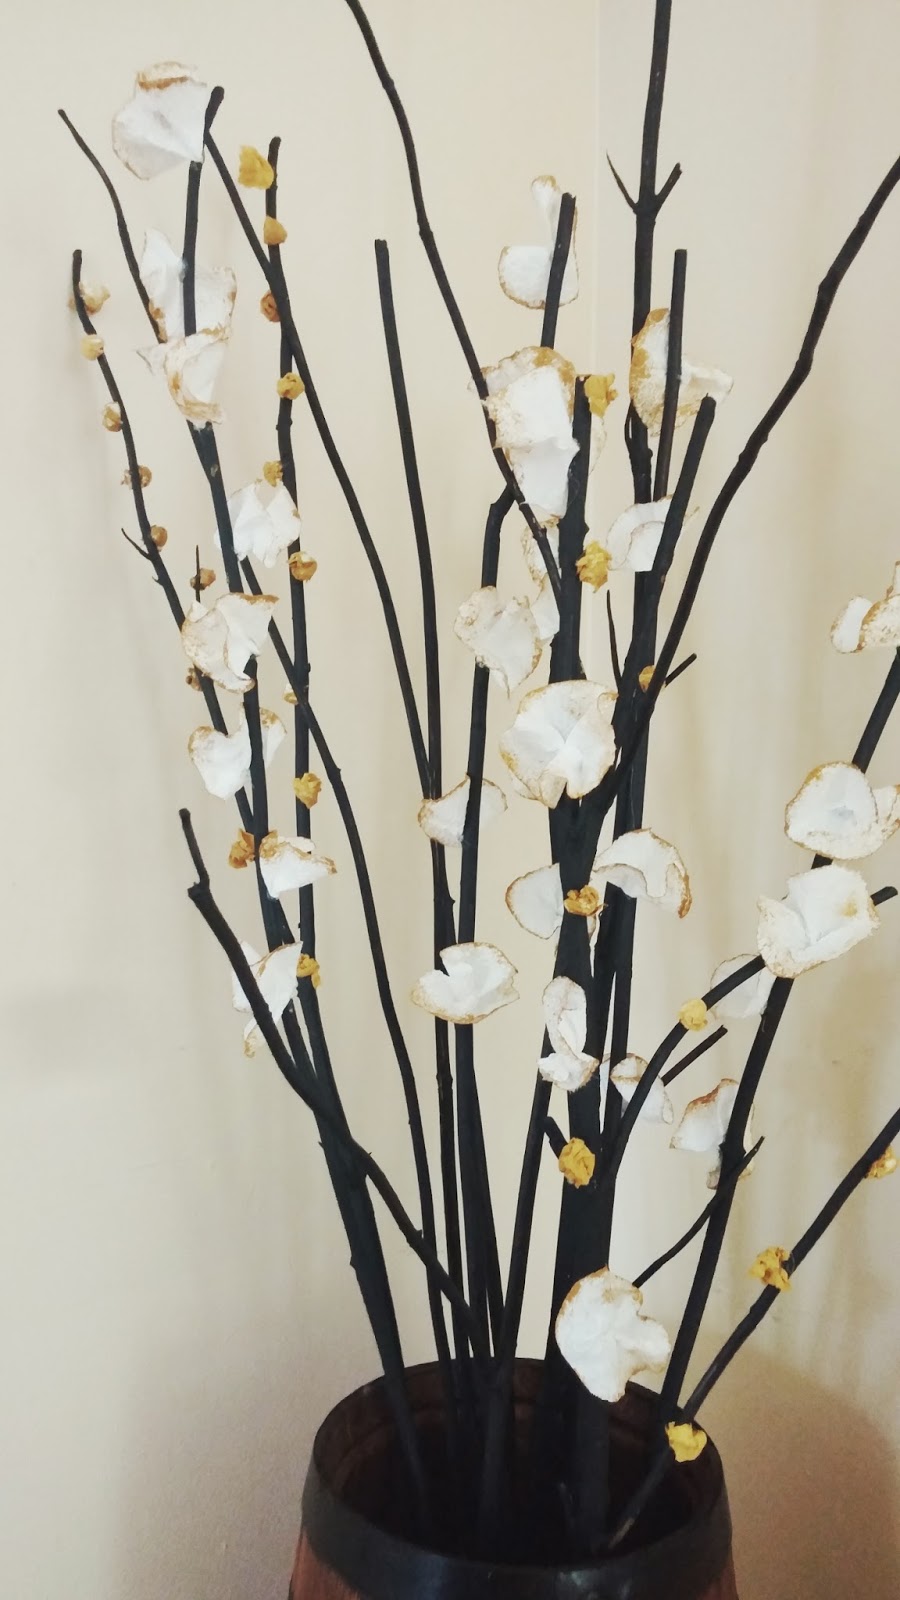
I just had a mini barrel at home, so i stuck some foam inside, poke these stems the way you want it, trim it at the bottoms if you need to, and cover the foam with some fake moss, and place it in a pretty corner, and get ready for all the compliments.

  
Oh-em-gee.. I love mine! So classy..so elegant! You love it too no?
See ya ;)

Thursday, 5 September 2013

Tissue paper roll saves the day!

As i am in the phase of recycling/ re purpose, i am looking at everything around me for crafty projects. And this time,  it was, my poor old used up empty tissue rolls! 

Tissue rolls-cut-press-paint-compose-frame. 


The frame too is recycled. I cut off the middle portion of the shoe box, painted it with neutral color, stuck all my flowers and leaves to the sides of the frame.  
The only difficult task in it was to give maximum points of contact for the flowers to the frame. The more surface area of the flowers, the more strongly it would stick on the frame.  So had to play around during composition a bit. 

Hence, the tissue roll saved an artistic frame! :P

Rolling stone gathers no mass


But rolling paper does! and how!
Yup, Another repurpose/ recycled art.
Cut-fold-roll-Done!

Oh i wish it was so easy as i said.. the journey started with hunting magazines and that too, colorful ones with lot of pictures! After sorting all out, which took me almost 5-6 hrs, folding was yet another task. Deciding on which side to fold, sorting out the colors accordingly, i thought i was almost done, only rolling was left.

That's where i got stuck. Thats when i realized how messy the project was going to be with glue all over the place. Thats when i almost decided to just chuck the whole project.


Then a thought came over. A thought which had a chance of saving and giving a new meaning to my effort for the past days of folding and sorting.
The thought of making the project glue less!
Stapling--no, sewing--oh no, how about containing it? like in a frame?--may be.
frame.. wooden frames.. wire frames.. paper frames..Tissue roll frames! Oh yeah! 

Cut the tissue rolls into thin strips, and pack in the rolled paper so tight that it doesn't even think of peeping out. There you go.


Tissue paper rolls, saved the day, saved the art! :D

By the way, tissue paper roll, saved my another project too.. will write about it soon..
Until then, Happy rolling! :D


Wednesday, 4 September 2013

Its recycled eh?

Hello..As i mentioned in my earlier post, i LOVE recycling!
One day, i was just browsing, and i came upon something really amazing. Yarn made out of plastic bags! I had to try it! I keep all the grocery bags usually to throw the trash out, so naturally had a LOT of grocery bags. Learnt how to make plastic yarn, also learnt that its called PLARN, and got started with it. Plarn Doilies yet again!

We had an old picture frame, which looked antique, without a backing. That's when husband and me thought of making the project 100% recycled.

Oh yeah, my husband occasionally helps me in doing some stuff, like framing and putting it on the wall. ;)

So.., for the backing, we used one of the packing box sheet, covered with another contrasting color grocery bag! and voila! Recycled art! I love how the colors got distributed and created a design.

Wednesday, 28 August 2013

Yarn wrapped floor lamp

My husband, really loves to buy stuff online,  i LOVE recycling. And there came one day, a parcel, a really long nice and sleek cardboard box. As soon my eyes fell on the packaging box, it was magical.. like in the movies with violins in the background, wind hustling through.. and an idea!--box-cutout-yarn-Lampshade! tadaaa...
I ran to get my bag of yarn, and started wrapping around.. oh, it took me an eternity to finish it, but, hey, it came out good right?
And here comes my favorite part- Christmas light garlands!


This one served as a colorful object in the corner during mornings, and a floor lamp during nights.
I love the whole effect of light passing through yarn, soft.
And i am happy that i was able to Recycle stuff and give a whole new definition to it.
Talking about recycling, i have done a lot of recycling stuff. I never got a chance to post about it.. will do it soon.. :)