Friday 26 June 2015

Zipper pouch : Burlap chevron

Hello hello helloo...
Summer is here and so are many visits from my friends and family.. Phew! What a Busy busy month.. Had been to an AMAZING art retreat hosted by my friend, Kearston. Oh man, got to meet couple of great artists from different parts of the country.. I learnt how different art supplies work, different techniques and styles of art, and had super fun.. We worked on artist trading cards, and here are some of the fun and beautiful ones i received from different artists-


What did i give you ask? I made some of these. Pen on acrylic paint sketches. 


Total fun. All the appreciation goes to Kearston, What a great job she did in hosting and arranging! And she gave us all some really cute and great things in her goodie bags.. lots of art supplies.Here is a picture of the art bar-


Talking about the goodie bags, those look so good.. Dont they? ;) pretty little burlap chevron zipper bag, made by, ahem, you know who.. *wink* *wink* 


I made like 12 of them.. and every one loved it so much! :

If you would want to learn how to make it, i will leave you a video tutorial here. Pretty easy to make, and pretty awesome to look..
Until then... tata.. will be back with lot more projects,  very soon! :)

Monday 1 June 2015

Frugal way to decorate a corner of your home : tutorial

Hi..
My latest weekend project, recycled floral arrangement. Wait, is that what its called? Well, i couldnt think of anything else.. so.. Lets have some fun, shall we?


I personally like this project because, its recycling, its cost effective ( i could actually say frugal), its fast, its fun and it looks absolutely elegant once finished.
We have these lovely hydrangeas growing in front of our home.. Just beautiful bunches of pink-purple-blue-green-white flowers.. Yeah.. It does turn so many colors from summer to winter. But every beautiful thing sometimes have to come to an end, and thats the early spring time.. No flowers, no leaves, dried stems, some even dead ones.. So.. Thats where our project comes in place.. Carefully trim the dried and dead stems, bring it home and make it look pretty, yet again. 
Since we are into June,tiny little leaves started to sprout, this is how it looks like-


Fortunately i had saved some dried stems, so just picked some and got started.
Spread it, and start peeling of its dry skin to have a smoother finish because we dont want those skin to peel off AFTER we finish painting.

Now for the paint part of it, you can choose any color that u like, paint it with pretty pastel colors and make different flowers on it, i just chose black. Any acrylic paint would do, might need 2 or 3 coats depending on the color you choose. Keep it aside for the paint to dry.
In the mean while, lets make some flowers!
You can go with any choice of paper and the color, i went with, guess what-- Kitchen tissues! I love them.. They have this lovely texture on them, doesnt cost you much, and easily available (at home i mean)
So lay it around, cut it into half, keep one half aside and work with the other half.. Fold, fold, fold and fold AND fold. Yep. Five times, everytime into half.


Factoid: Did u know that any kind of paper, when folded into halves, i can be done only 7 times max? Fun,  right? :)
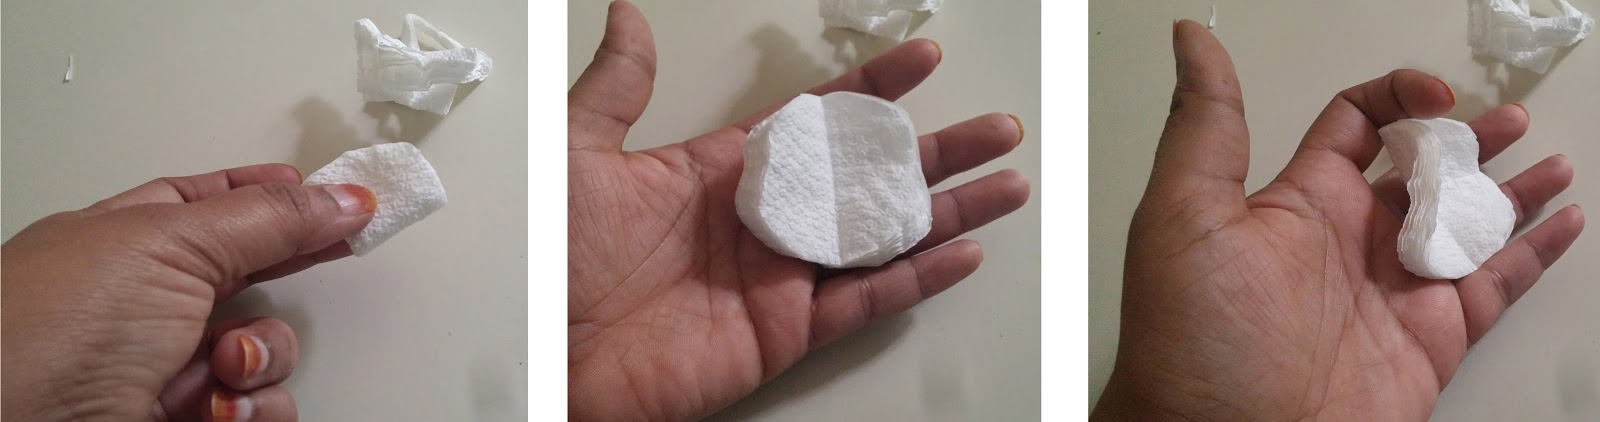
Ok, so now we just need to pick the corner and cut an arc.. Like a quarter of a circle. And tada.. We have so many circles or circle looking like pieces in our hand. It need not have to make it perfect circles because we are going to crimp it anyway. Do not seperate it yet. And save the rest of the bits and odd pieces for something that i will explain in a bit.

Take a paint brush, preferably an old ones with bristles all over the place, dip it slightly only the tip of it in paint, and dab the ends of the circles we just cut.. It need not have to catch the paint all over, do not hesitate to seperate the stack just a little bit and paint.. Lets get some texture out of the brush.. Dots here and there.. Yes. Lovely! 


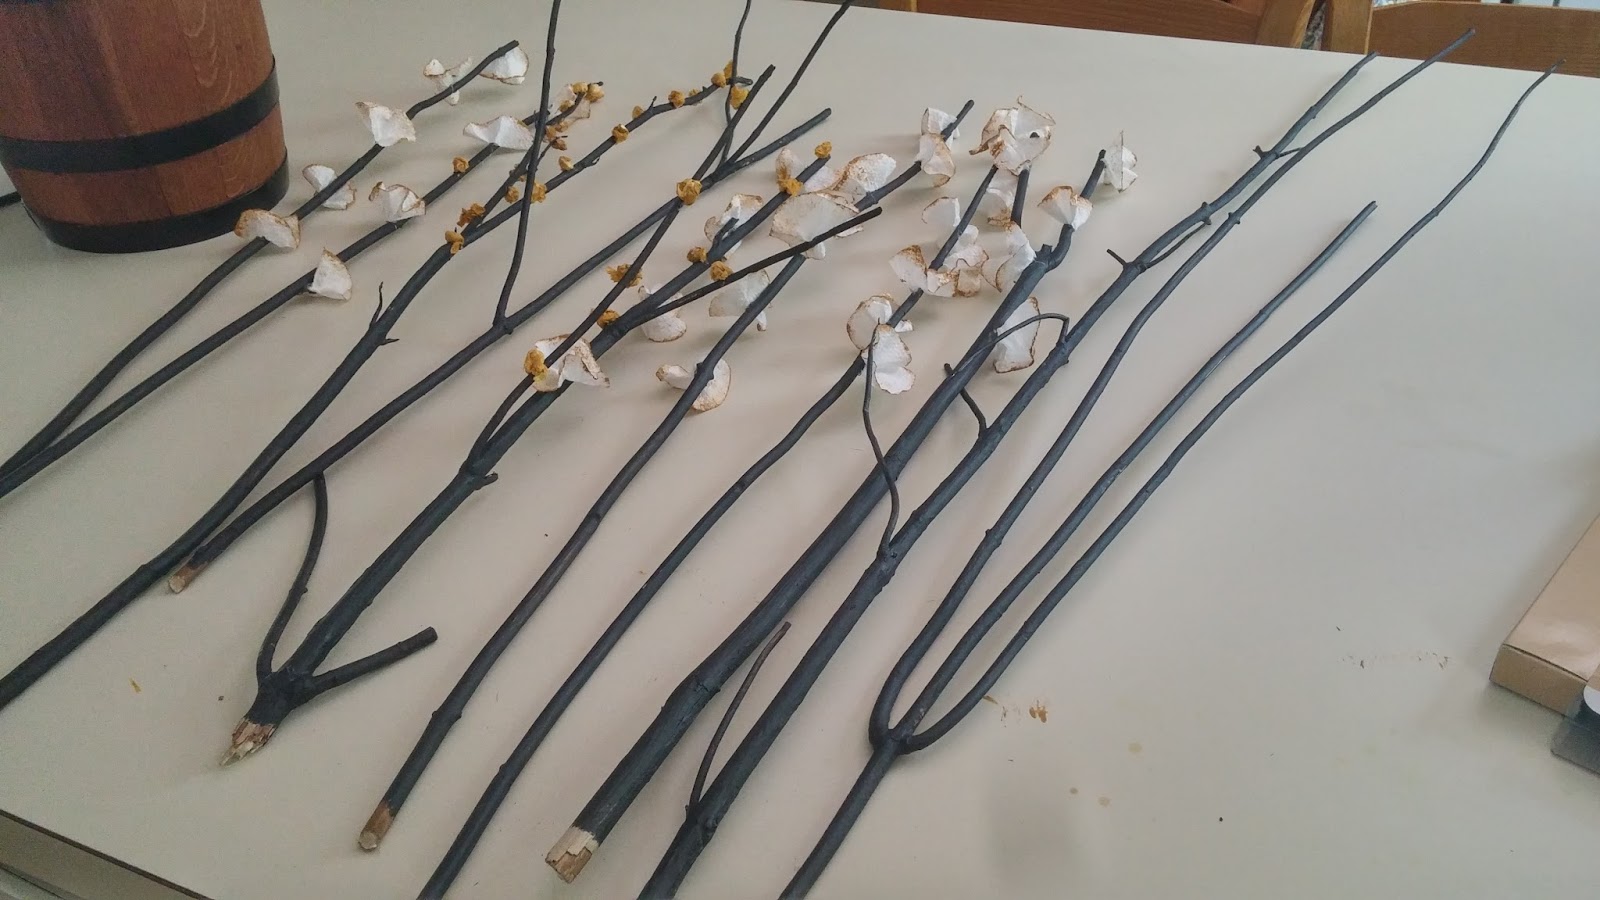
Leave it for drying for a bit, and lets go check on the stems. Nice and dry and black. 


Now back to the flowers, seperate the dried circles, and just give it a pinch at the centre. See? We just made a beautiful flower!

And thats it, hot glue-stem-flower and tada.. You have your own one of a kind, hand made, floral accent to your home.


Remember i asked you to save the bits and odd pieces previously? Lets make some buds out of it. Nope. Im not going to waste even a bit of the tissue paper.
So all you have to do is, take a bit, roll it into your hand like a dough, and paint the same color on it all over. Mine looks like a yellow popcorn.. Lol.. But doesnt matter, it looks natural and pretty anyway.. 


Glue those bits also onto the stem, and stack them together and aaah...(violins playing the background)
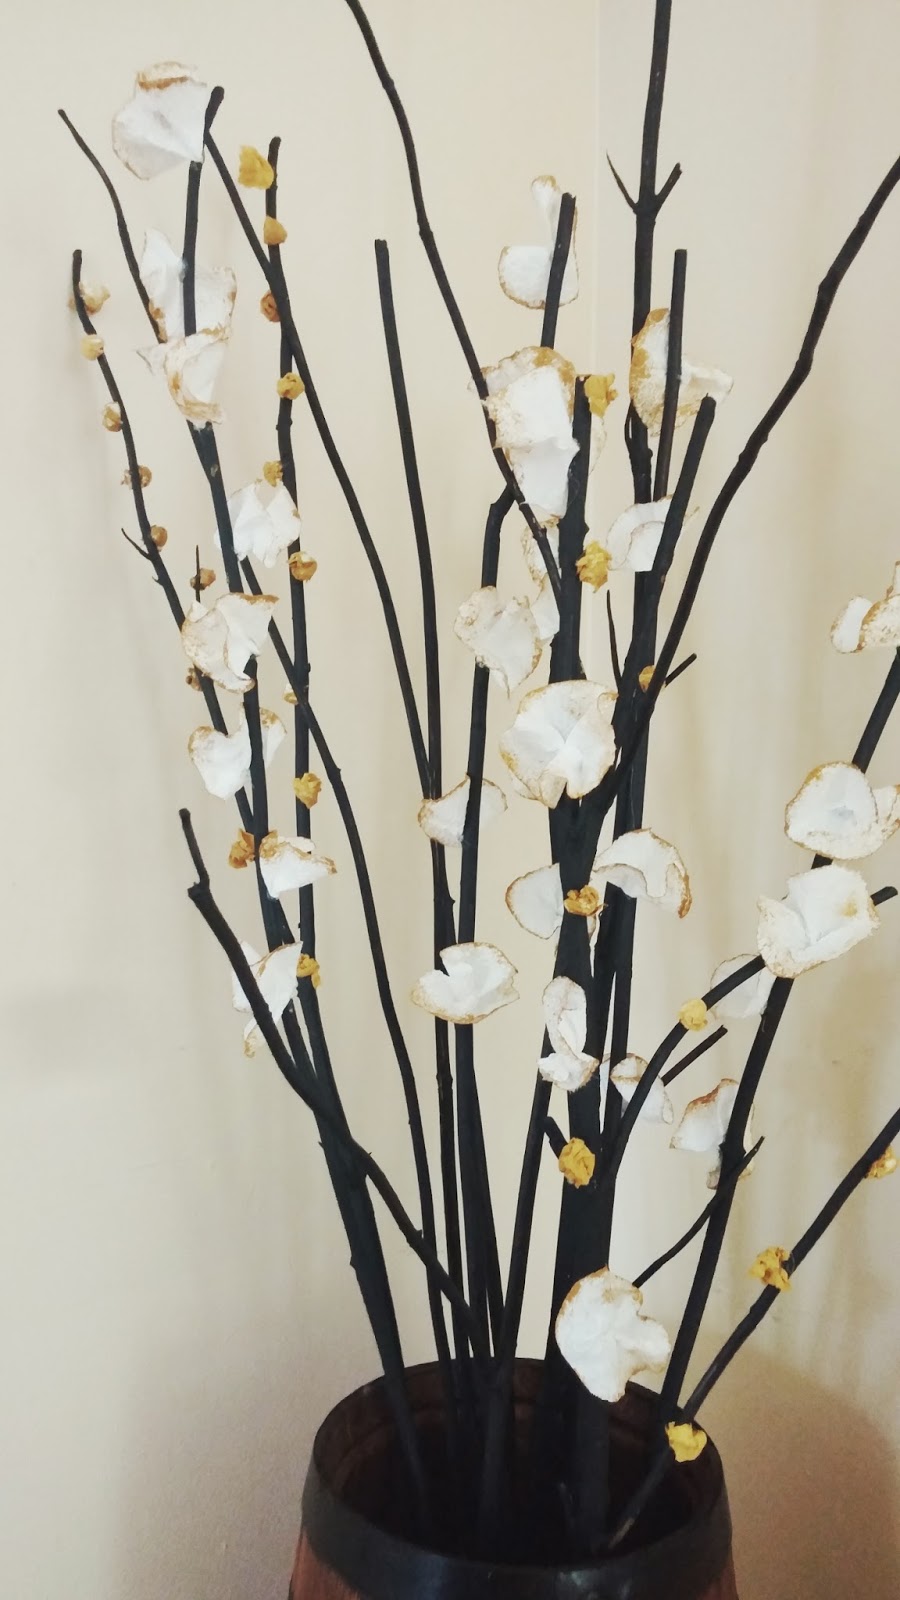
I just had a mini barrel at home, so i stuck some foam inside, poke these stems the way you want it, trim it at the bottoms if you need to, and cover the foam with some fake moss, and place it in a pretty corner, and get ready for all the compliments.

  
Oh-em-gee.. I love mine! So classy..so elegant! You love it too no?
See ya ;)

Friday 29 May 2015

Lovely Val

Hey Everybody!
Ah what an evenful day it was yesterday at work! A friend of mine visited at work (which i always like), the fire alarm went off because of the bad storm and some nasty lightning (everybody and everything is safe), had the best laugh of my life with my friends, and made two people very very happy! Valerie and me.
Let me tell you about her a bit.. Val is one of the best people i know, perfectionist, always giggling, always in high spirits (as far as i have seen), and oh my! she makes the most beautiful flower arrangements.. and she even taught me how to make a bow. Yes. I admit. I do not know how to make a bow. now get over it. :P.
So, Val.
Dont you think she deserves a nice little gift? So i made her a crochet and bead necklace set. Tadaa...

And i gave it to her at work, and she LOVED it! :)
Doesnt she look gorgeous with those pretty blue eyes?


Val wanted to have a necklace similar to the one my other Friend/coworker who bought the necklace from me. Katelyn.
Here are some pictures of the other one:


And thats Katelyn! Adorable little thing.


And thats how my day ended. Happy Val, and more than happy me :)
Hence proved.
(totally reminds me of those math problems lol.)
ok bye.

Wednesday 27 May 2015

Layered Triangle shawl

Hello hello hello!
Lot of things have happened in my life since my last post. Had a mini craft fair, joined a new fun job, had my first dance performance, made so many friends, gave (and still giving) driving road tests, birthday gifts, send off gifts, just-because-you-visited-us gifts, so on and so forth. I will (may be) try to share all the projects.
So, for today, let me share with you, a project which has challenged me physically, mentally and LINGUALLY!
Physical challenge because apparently i was crocheting too much so developed pain in my wrist (and ouch it hurts!).
So anyway, moving on..
Lingually challenged because..I had seen this shawl so much on Pinterest and so many other places-- pattern should be very easily available.. right? well yeah, i did have a STEP BY STEP video pattern..(but wait!) it was in a language i just could not follow. So i Juuussstttt blindly (tried) to follow the tutorial.
The shawl came ABSOLUTELY stunning and of course, it had to be! Because it was for my gorgeous Mom..

If you want to try this shawl,
Here are the original Video links :
Part-1 : https://youtu.be/Y-qLZOvmQLI
Part-2 : https://youtu.be/mP5brLEVcoI
And some pictures--


Gorgeous! Dont ya think?
Im thinking i should may be translate and re-write the pattern in English. What do you think? Should i do it?
Love,
K.